Guys – Girls it’s time to install shock absorbers on your ride.
First off when looking at my shocks how do I know they need replacing?

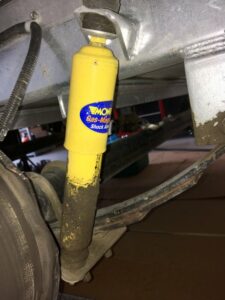
- After finding your shock absorbers, hidden behind each of the four wheels on your vehicle, you or me if it’s my vehicle will be looking for internal compressible oil that has founds it’s way to the exterior of the metal shock absorber. The visual sign will usually be wetness around the shock unit with very often traces of dust and dirt build-up attaching to the wet leaking oil residue.
- The second way the probability of needing new shocks will be when driving your car/ truck the steering ability to go around corners and rough roads are Not feeling the stability you were once used to and also the extra up and down bouncing of your vehicle while driving down the road. Here’s a little test to try right in your driveway, stand in front or at the rear of your car grab the bumper and push up and down to start the bounce. Note if your ride continues to bounce up and down more than 3 times then pretty much your shocks need replacing like maybe months ago.
Can I replace my worn-out shocks myself?
Of course, you can, you will just need a few tools to help you get the job done.
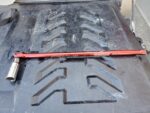
- A 1/2″ breaker bar, I know it sounds intimidating, so how about if we just call it a flex bar?
- A 1/2″ drive socket that fits the nut and bolt head or a wrench to be used on the bolt end and the socket on the nut end.
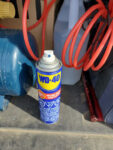
- Some spray lubricants like WD-40 are sprayed on the threads of the nut side for easier removal of the nut.
- Maybe now would be a good time to be wearing your blue or purple latex rubber gloves or if you are really into it, then those fancy-looking mechanics leather gloves you have waiting to try the fit and feel, let’s get the job done now. Also, a medium-sized hammer to tap out the long bolt when you have removed the nut.
- Why did I say that, well because I thought that I didn’t need a light to guide me in the dark and I got sidetracked with something else. Then when I came back I had forgotten that I had not removed the nut holding the shock on. The good thing is I didn’t hurt the threads on the bolt trying to knock it out. Hence, a Light of any kind is to be added to the tool list.


Used For Loosening Tight Nuts and Bolts
Steps to removing the shock absorbers from your awesome automobile
- Depending on your make and model you may have to remove the tire to work on your shocks. If so, then a small jack may have to be added to your list of tools. This would mean jacking up the tire just far enough from the ground to remove the tire.
- If this is the case then (Important Here) Have your vehicle in the park position, parking brake on, or some kind of blocking behind the wheels if you are especially working on an inclined area.
- Okay, you should be able to see your shock now, and best to do it one at a time. Finish one then goes to the next one.
- You see the shock absorber now so spray the threads that are exposed by the nut for easier removal, and let the WD-40 soak into the threaded area for a few minutes to penetrate and lubricate the area.
- Let’s get the nut off start working the tools and keep that light beaming on your work area unless your eyes are better than mine, did I mention I wear glasses and that I am in the process of getting an eye exam, soon now? Okay, nut off, hammer ready tap out the bolt, wiggle out the old shock. Remember there will be a nut to remove at the top and bottom of the shock absorber. This probably won’t be the last time I forgot to mention something about shock absorbers

Installing those new shocks that you picked out for your awesome ride
- I am writing this article for the Girls and Guys that enjoy taking on their own car repair jobs for the fun of learning how to do it and this may include the first time tackling a project like this one.
- Chances should be very good that the previous shocks installed on your vehicle have been installed the correct way, so just eyeball the old ones coming off and install the new shocks the same.
- Affiliate Disclosure – When You click links on this site and buy products, I may receive an affiliate commission through Amazon.com. You will not pay more by buying when You click my links. When I suggest certain products, it is because my research or personal experience has shown that they may be helpful to You. Thank You for your support.
- New shocks installed with bolts and nuts in place, tighten snugly with ratchet wrench and socket. Just one last step here, did I mention that we need to torque the nuts to manufacture specifications. I really think I forgot to put that into the tools needed assortment list.
- Okay, torque wrench set to the specific torque requirements for your vehicle, now work the handle until you hear the click. You’re done. Put the tire back on and keep the torque wrench handy to tighten the wheel lug nuts, again at the recommended torque specifications, found in your vehicle maintenance book or online search for your vehicle specifications.
- Rinse and repeat for all four shocks. Hey if you are short on time do two shocks front one day and two shocks rear another day, maybe plan on completing total shock replacement within the week.
“This Video Should give You a good visual of how easy it can be to change your own shocks and have fun doing so.”
Would like to hear from you if your experience changing the shocks on your favorite ride was a fun project or a tough job. I welcome all stories if you feel to share your moments changing out shock absorbers. Thanks for now … Doug
Check out My About Me Page if you have a little spare time, thanks for now.

