Hey Girls and Guys it may be time to install brake pads on your awesome vehicle, your ride. DIY time.

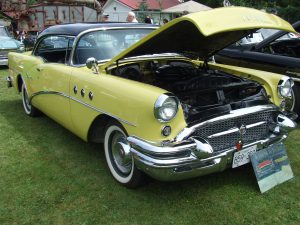
Visualize Your CAR or SUV or Truck in this picture instead of mine, then get at it and get the job done and feel the pride in your work.
Steps that you need to follow to change your brake pads
- Remove the wheel.
- Remove the slider bolt
- Grab the caliper and pivot it upward
- Now you can slide out the old brake pad
- Get those retaining clips out and replace them with new ones
- Grab your new brake pads and slid them into place
- Retract the same as positioning the piston back into the correct location
- Have a look at your brake fluid here, a good chance some has leaked out of the reservoir.
Let’s look at all these steps and (Brake) Break them down
- Removing your Tire and Rim from your vehicle should be done with the tire still on the ground allowing you to loosen the lug nuts at the Rim. Keep in mind to only break the nuts loose and stop there. If you are short on time just either do both front or both rear brake pads at one time. Lots of time, then keep the tools handy and do all brake pads if needed.
- ————————————————————————————————————————–
- Okay back to the lug nuts you just cracked loose, with still some tension on the nuts holding the wheel on, Right? Now you can jack up the wheel off the ground only high enough to remove the wheel (Tire and Rim). Find a solid area under the vehicle to place the support jack stand. “IMPORTANT HERE” always use a brand name jack stand from Automotive


Store preferably. 2nd choice is a piece of good strong wood, like a 6-inch x 6 inches or 8-inch x 8-inch piece of wood for support, but only if you don’t have access to a quality-made jack stand.

in place so that it stays within its normal traveling distance so it doesn’t come out too far to possibly create an out-of-position brake piston. Importantly you just want to keep the brake pad piston in its ( normal-sliding-traveling- working area).
Probably by the time you get to the last brake assembly unit number 4, you will be so fast that you may not have to hold the brake piston in place.
Just saying maybe or maybe not? Just keep in mind that the brake fluid reservoir will be applying some relaxed pressure down to the brake pad piston you or I am working on at the time.
A backyard tip here is that at one time my “C” clamp malfunctioned, basically broke and I don’t know why, but we will call it fatigue or over-usage. My alternative was to find a piece of wood in the wood shop to fit into and hold the piston within its safe travel zone or in its comfort zone shall we say.

Tools! Have I Mentioned Anything About Them To Make The Job Easier For You?
These tools would be very handy to have by your side to get the job done sooner, so you can be out enjoying other activities. Also, Don’t forget to have your new Brake pads that fit your vehicle by your side and ready to be installed.
Affiliate Disclosure – When You click links on this site and buy products, I may receive an affiliate commission through Amazon.com. You will not pay more by buying when You click my links. When I suggest certain products, it is because my research or personal experience has shown that they may be helpful to You. Thank You for your support.
Tool List Guide For You
- Breaker Bar for the lug nuts and a Ratchet Wrench and Socket for the caliper bolts.
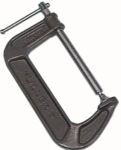
- A “C” clamp 8 inches should work just fine
- A small wire brush (optional) for cleaning off surface rust
- A His and Her buddy you should have by your side always (DW-40)
- Brake Grease for lubricating brake bolts and stuff.
- Hydraulic jack or even your lifting jack that comes with your vehicle, get out the Manuel to find where it lives within your Car / SUV / Truck, it’s there somewhere, happy hunting.
- A Jack Stand for your personal safety to hold the vehicle off the ground while you complete your brake job. REMEMBER THIS ALWAYS ( Safety on the job is first and foremost on your mind before anything else)
- Also, a torque wrench would be nice to have on the job. Pretty much no matter what you will be working on will require the use of a torque wrench for accurate bolt and nut tightening for your protection and others.
- Done here!, but if you’re like me Rubber or Leather mechanic gloves will protect your hands from environmental deposits on whatever you may be working on. Again safety, a good idea to wear safety glasses they are so cool looking nowadays. Protect those eyes seriously. If you are working in a dusty area or creating a cloud of unknown particles then snap a mask on your face, sooner than later, like before rather than after.
If You are like me, after reading and absorbing what I have read I do find that visually seeing what I am learning always ties up the loose ends as this video may do for you. Enjoy
Okay, let’s finish up, wheels are back on or waiting to be installed back on your ride. Let’s pump up that brake pedal, nice and easy just slowly depress the brake pedal with tenderness.
This moves the brake fluid within the system down to the brake pad pistons. Did I think to tell You what may cause early brake disc wear?
Soon you will feel the brake pedal firming up. Keep in mind the engine has not been started yet. Now that the brake system is charged up with brake fluid start your engine and maybe after a couple of more pumps on the brake peddle, you will have a solid feeling peddle.
My Mission Statement: Here to help Males, Females the Young, and the Inspiring Aging who are interested In Do It Yourself (DIY). How to Repair (Fix) your rides aliments while enjoying the fulfillment of (DIY) pride.
For more information on Braking your vehicle while coming to a stop, then have a read here.
If you have a comment to share or even a good story about how your brake job went for you then I would very much like to hear from you.

Thanks For Now … Doug
