Introduction to Restoration
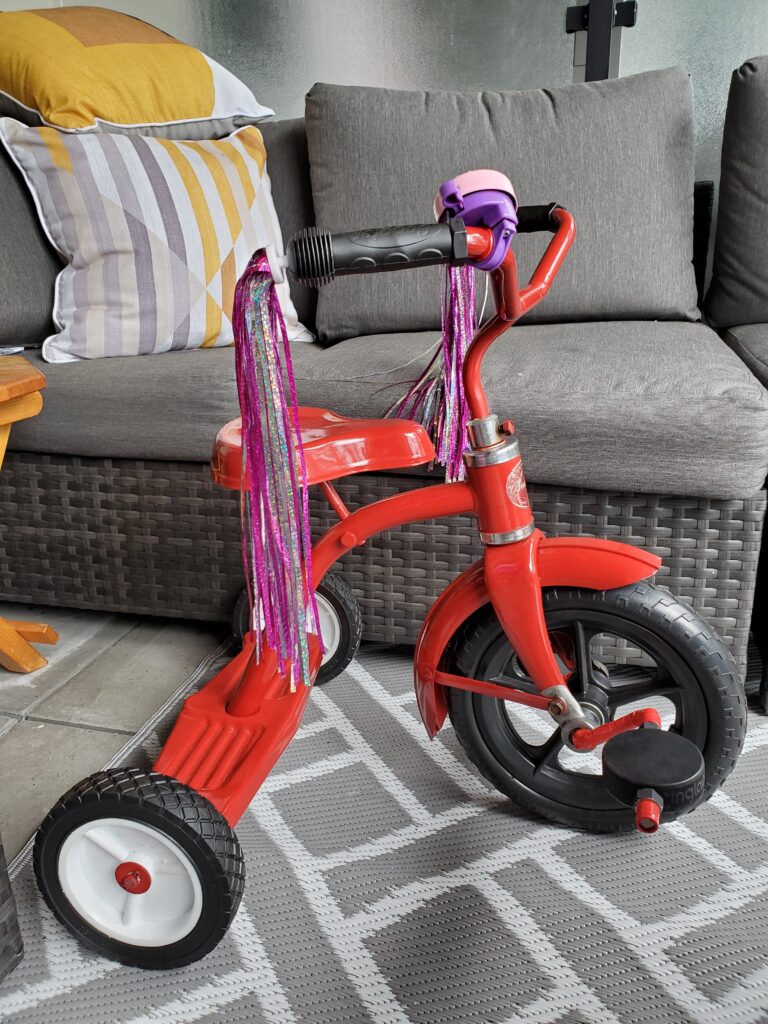
Thanks for Dropping in and Welcome. This tricycle now restored as above has been in the family for around 49 years. Gifted to our first-born daughter “Asil”
As with all young starters bruises, scraps, and overturns of tricycles are common happenings. Then when they get their little “pedal legs happening”, look out they can be gone in a second pedaling down the road, most houses years ago didn’t have fenced yards, at least ours didn’t, or did it? just can’t remember for the moment.
As you know mothers and fathers of little people (your kids) your driveway is just a runway towards bigger Trike roads to travel and explore.
Okay, let’s take a look at the original (Trike-Bike) 49 years ago and move forward. Keeping in mind that after our first daughter was born two more daughters were born to ride also, “Nonnahs and Yasnil”
So, after 49 years of the Trike being pedaled for years and years stored indoors and outdoors in the rain, snow, and sun it was now time to make this restoration a must-do Project. I must admit to this that the idea came from my wife to me, to fix up our girls ridden to extreme Trike. She supplied the idea I supplied the labor to make it come together.
We were finally moving to another home on Vancouver Island, and here was this little rusted Trike hiding in the corner of our old shed in the back of our property on the mainland. My wife was first to spot it and the words from her mouth were we need to fix up this Trike and soon, spilled out without hesitation.
Time for Some Images
Just displaying a few images, I still had in my archives, rust being the number one compromiser.
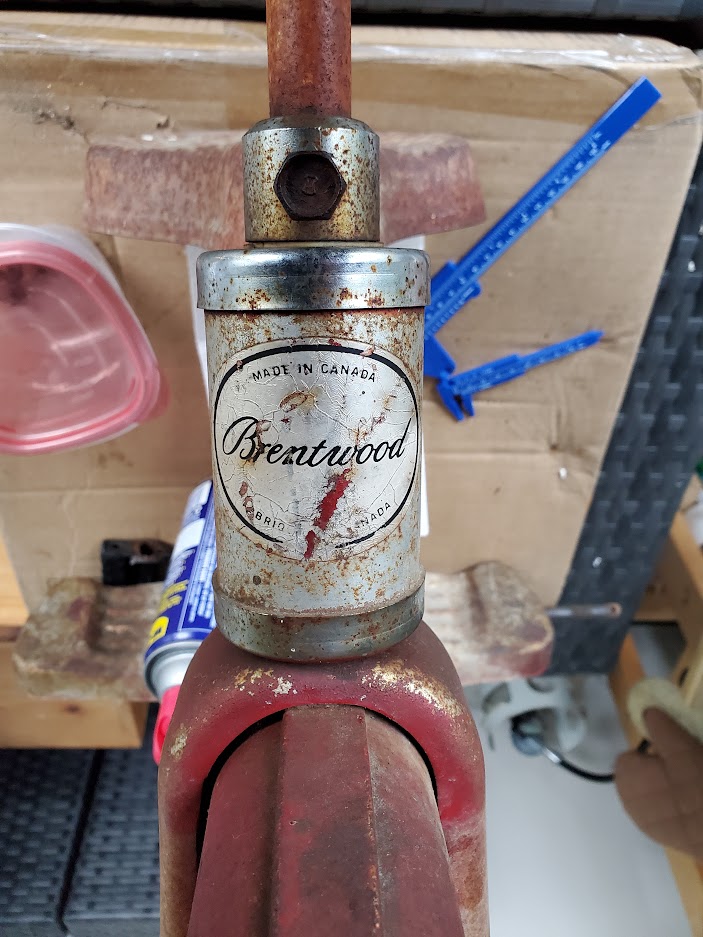
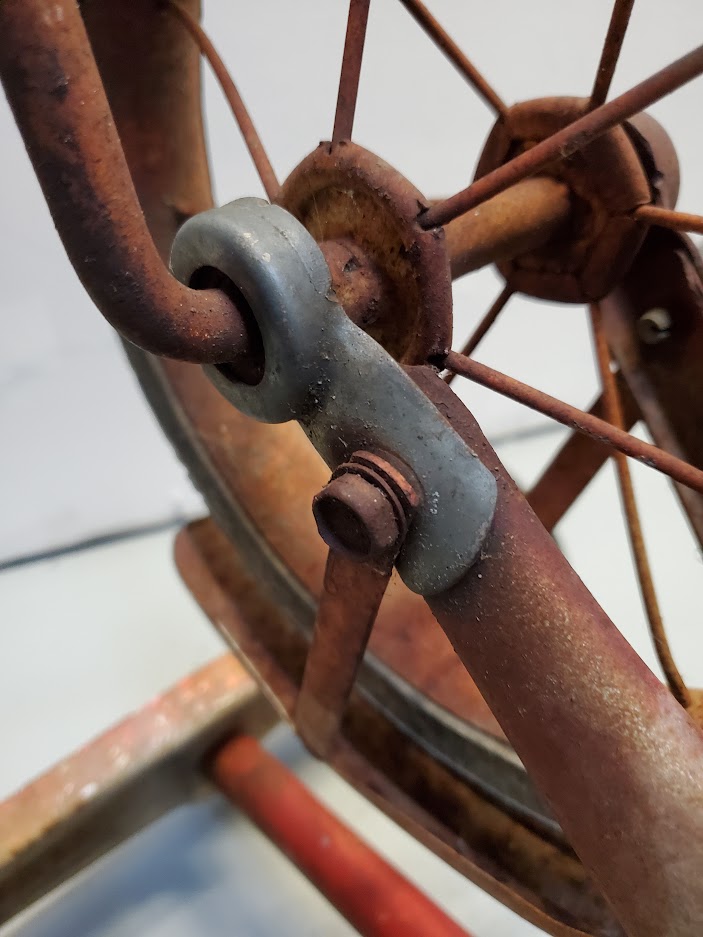
Time to put a plan of action together to tackle the rust and corrosion as seen in images Left and right.
Number 1: Disassemble Trike
Number 2: Take the frame to a shop where I can sandblast off rust down to the bare metal.
Number 3: Prime and paint Trike
Number 4: On the hunt for new tires, pedals, hand grips, and accessories. This was a challenge.
Disassemble the Trike with the helping hand of DW40 to loosen rusted nuts and bolts. At times spray, sit, and wait or grab a snooze, yes it could take a while to unseized the rusted nuts and bolts.
All apart now, handle grips, pedals, and accessories removed. Time to make an appointment at the sandblasting shop.
Sandblasting appointment time on a sunny day is 11 am everything is supplied for the safety of use in a sandblasting cubicle, just bring money. 20 minutes of fun sandblasting, another 2 minutes to pay and I was out the door, the frame of the trike stripped down to the bare metal.
After doing the finishing touches light hand sanding starts with medium grit and ends with polishing with very fine sand-paper, proceed to primer time.
Primer paint is now being applied to the rust-free frame in my makeshift paint spray booth.
I have the perfect paint booth to work in and yes that is the back box of my truck
And here is the Image of the primer painted frame 2 coats applied
You can probably see the large black yard bag covered in grey primer paint, right? but if you look really closely one can see the 3 cloth pegs holding the black bag to a (no see um) rope line under the black bags.
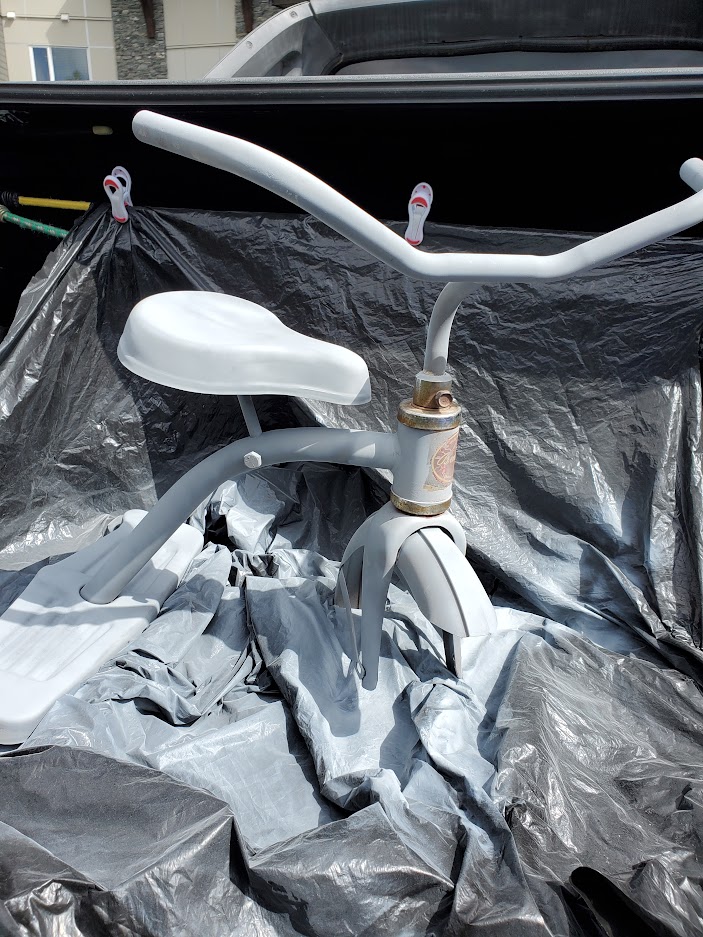
This painting task took me about 1/2 hour, normally this should be a 15-minute spray from an aerosol can. Why did it take me so long well I was dealing with an annoying intermittent wind factor. No set time for gusting I believe a lot of my spray paint went air born of course missing my mark the “Trike”
The Fun Has Now Begun
Here I am now on the hunt for pedals, hand grips, and 3 wheels. One the driving or pedal wheel and two small rear axle wheels.
I thought finding used parts for the Tricycle would be a fun exploration of tracking down parts. Well not so, anything found was in worse shape or missing parts from the frame of the older Trikes that I tracked down.
Now what? seeking new parts for a 49-year-old Trike, how is that going to play out? Not well I am thinking at this point in time.
Welcome says the sign in the window of the first Tricycle-Bicycle shop I visit. The owner is busy I have time to check out a few Trikes and their accessories, but no luck. The manager is now free so I ask him about driving axle assembly units and pedal assembly types. He looked and showed me all the types of pedal units but no matches for the family Trike.
The store guy finally asked me how old the Trike was and when I told him that it was older than him assuming he was around 45 years of age. Well after seeing the expression on his face, I knew what he was going to say, and sure enough, he says to me “Good Luck” That design of Trike changed 30 years ago. Gulp went I.
Here I Am in a Dilemma
What do I do now, nothing new to retrofit and nothing old to be found in good shape? I am now aware of the situation and time is ticking on.
With the new and old accessories now off the table, the only way to go now is to design and build my own front axle-spoke Trike assembly unit.
Parts needed for the axle build:
- 1/2 in. round steel for axle shaft
- 1/2 in. inner diameter axle wheel assembly
- Using 12 in. wheels with bonded rubber tire to rim
- Welding required and heat to bend and shape pedal angles
- 2 hockey pucks for pedals
Here is My Design to Build Front Axle Unit
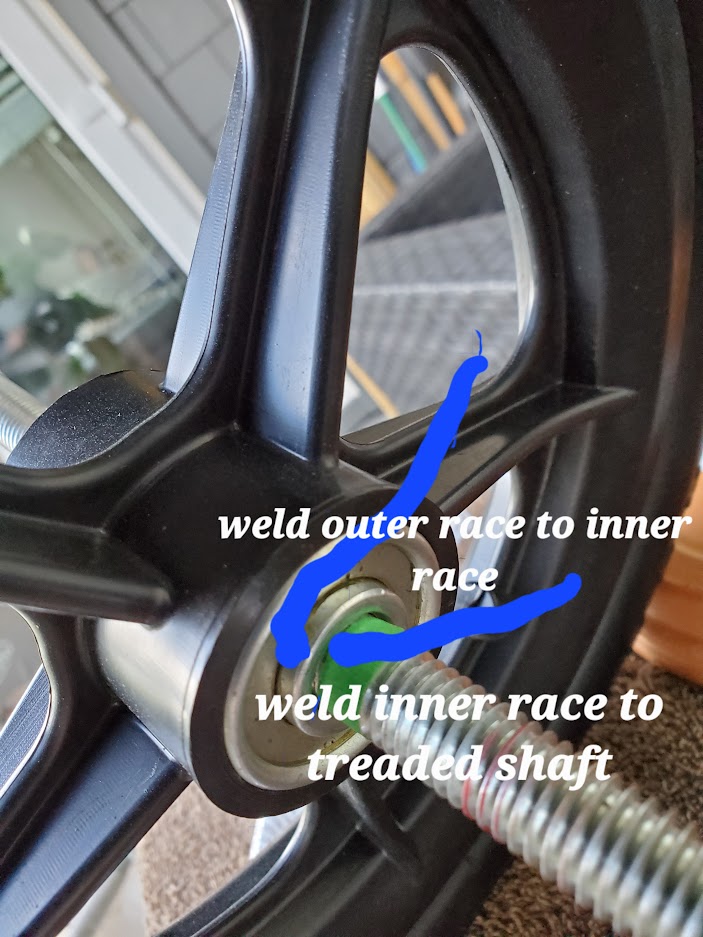
Thanks to my “Nephew” (the Welder – Fabricator) “Mike” the final steps were completed to build the front axle. After many trips back and forth to his shop, we finally worked out the details of welding and shaping the front axle assembly.
The welding of the outer bearing to the inner bearing was a challenge, dealing with rubber close to the metal to be welded, consideration of heat transfer was of great concern. It was a total success
Then finally the last coat of Fire Engine paint was applied at my “Nephews” Welding Shop the following day.
The Success of Work Performed (a Grand Moment)
Images of end result:
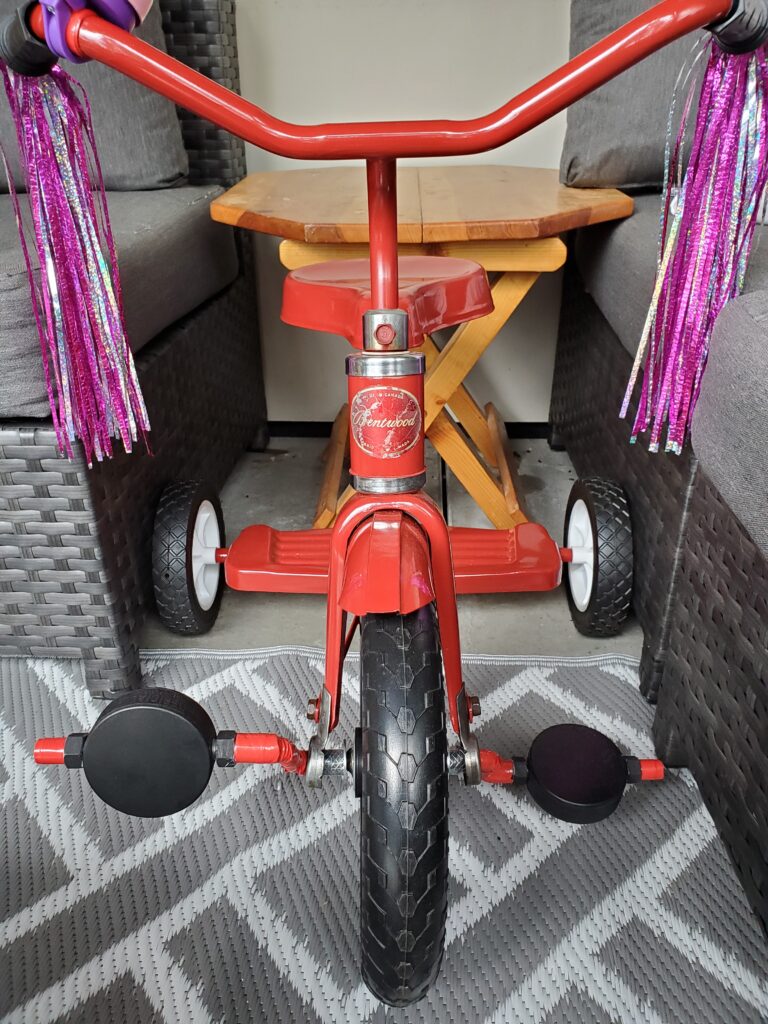
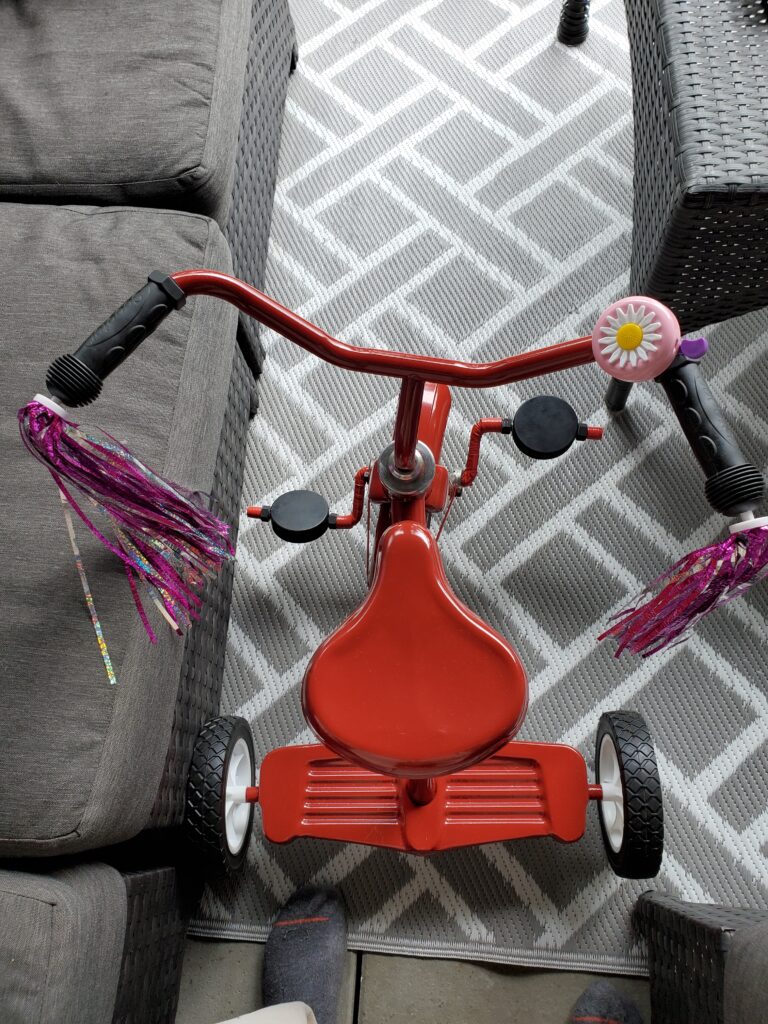
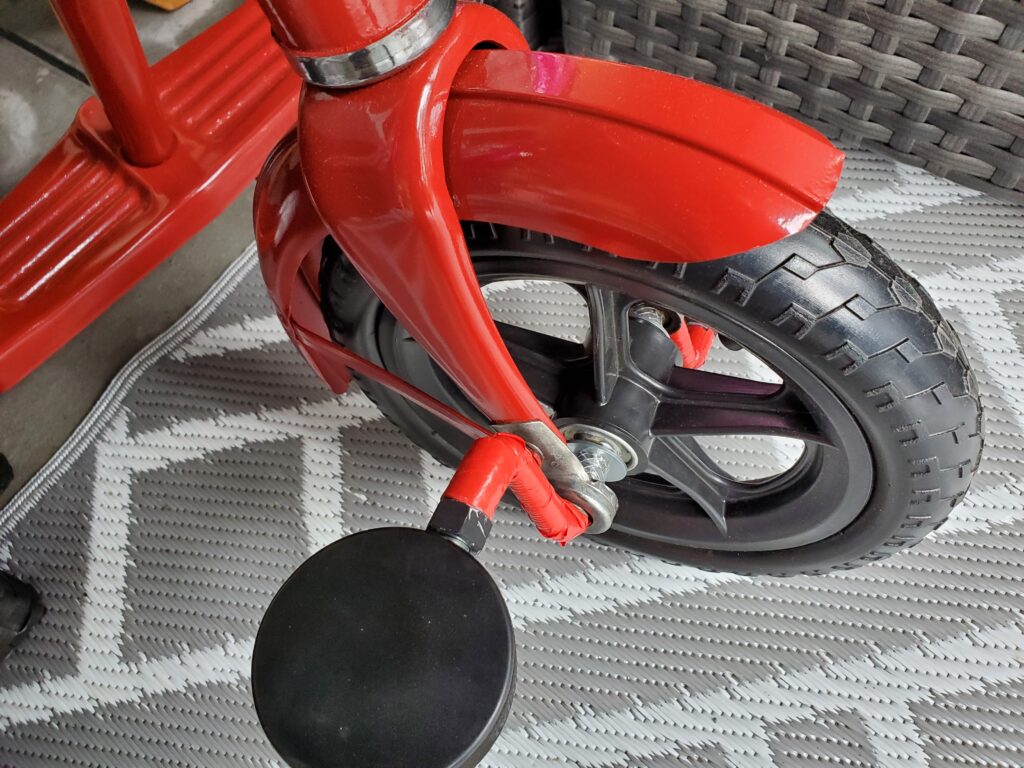
Our youngest Grand Daughter “Aivil” is now enjoying sitting on the Trike, she is just a little over two years old when she received the trike, so it won’t be long before her little legs will be cranking away on those pedals, and away she will go. Yes, those are hockey pucks for pedals if you were wondering.
“Note” this year, make, and model did not come with a remote to disable forward and reverse motion.
By now the newer ones must have am sure anti-theft and high-speed shut-down safety modules as a built-in feature. I would think after 49 years, okay thoughts for another time maybe?
